
If you have been looking for a way to sell your products or services online, then look no further! The process is much easier than you might think.
Setting up an online store is one of the most valuable things that you can do for your business. Expanding your store to reach online customers will increase your customer growth and overall revenue. But, in order to sell your products or services online, you need to have a website that can handle an online store. As much as we talk about WordPress, it might not surprise you to hear that WordPress can do that too. Cool, right?
While setting up an online store may seem difficult and time-consuming, it is a very easy process. The free plugin that you will need to install is called WooCommerce (which we will show you how to do later). This site was created to allow store managers to run an eCommerce site without having to utilize a web developer.
WooCommerce is a free, flexible, and customizable plugin that will allow you to build a web store, quickly and effectively. This plugin is fantastic for those who are launching their own business, designing sites for clients, or revamping an existing site. WooCommerce also allows its users to keep track of incoming sales, reviews, and stock levels. It comes with shipping and payment options such as Paypal Standard, BACS, and cash on delivery.
WooCommerce is completely customizable. It will allow you to choose your website design, enhance your store with free and paid extensions, modify the core plugin code, leverage hooks and filters, modify functions, and build on top of the API and webhooks. WooCommerce also comes in the form of a mobile app that you can download to manage your store on the go!
To get started, you will need a WordPress website and some products or services that you want to sell.
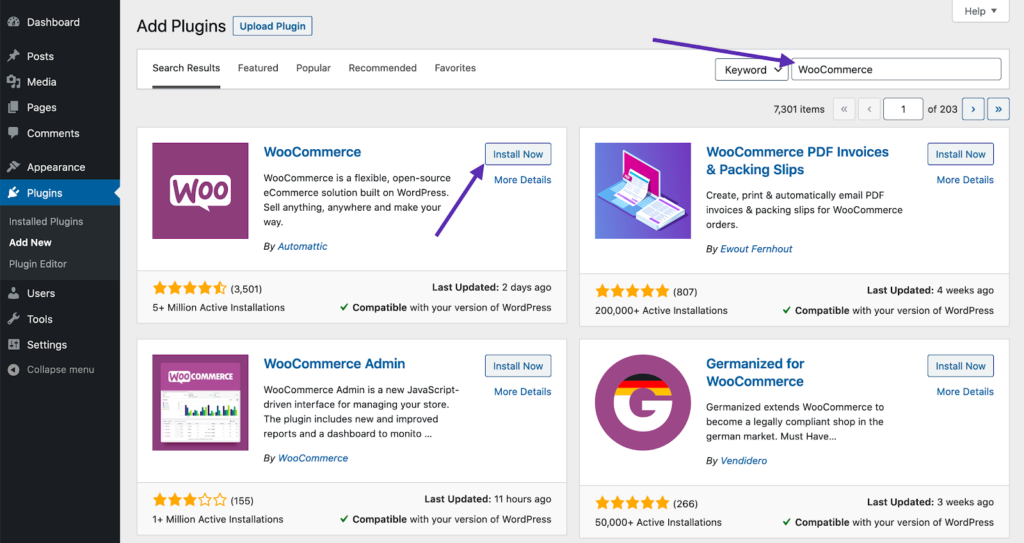
- Log in to your WordPress website. Before you do anything, you will first need to install WooCommerce. Remember- this is a FREE plugin! Look for Plugins on the left-hand panel on your screen and press Add New. In the search bar on the top right-hand corner, search for WooCommerce and click Install Now. The correct plugin’s author will be listed as Automattic. You can see it listed in the box in blue. You might have to wait a few minutes for the plugin to install. Once it has installed, press Activate.
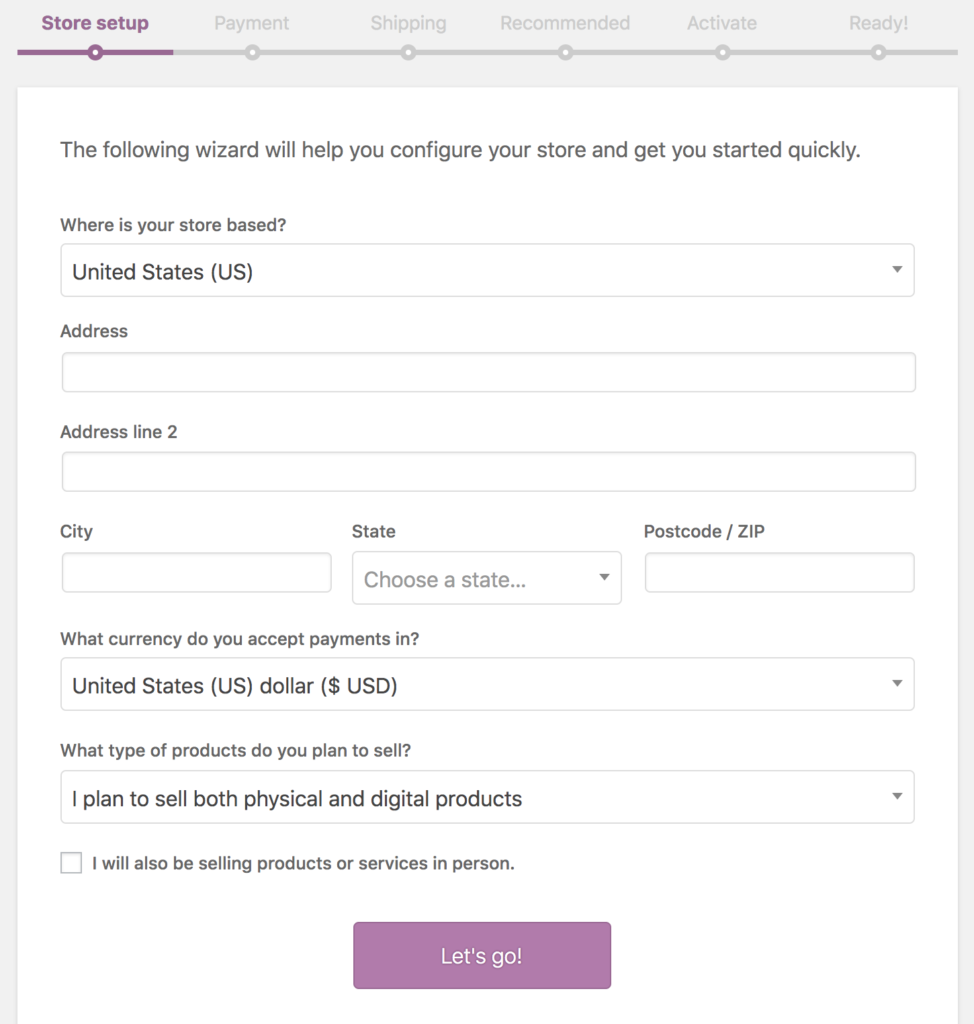
- That plugin is now active on your website- Cool! You will now have access to the WooCommerce Setup Wizard. The Setup Wizard will help you configure your web store’s settings such as location information, the types of products that you are selling, and payment and shipping methods. The great thing about the Setup Wizard is that things are not permanent! You can always go back later and change your information if it changes. It will first ask you to enter information about your store’s address, the currency you accept, and whether you will be selling digital or physical products.
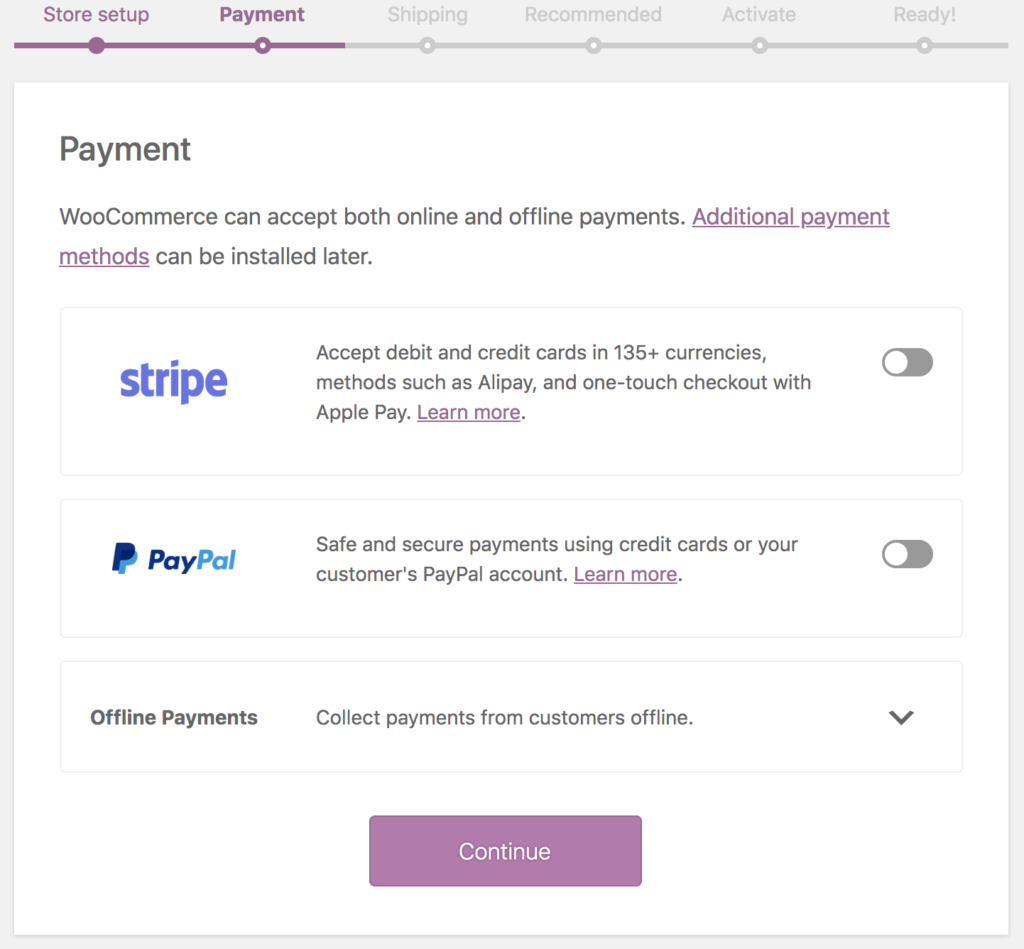
- Next, you will need to detail which payments you will be accepting using your online store. It will automatically offer the option for you to use Stripe or Paypal, but you can also choose to accept other forms of payment such as checks or cash. All you really need to do is select the options that you would like to use and WooCommerce will set them up for you. There are more extensions that you can add that will allow you to add payment processing.
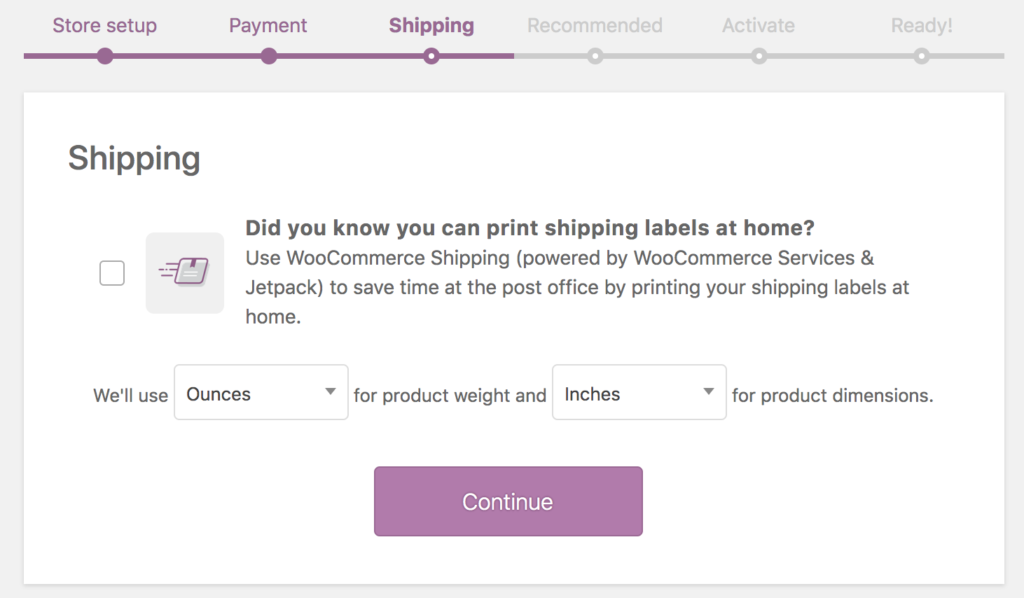
- Next, you will need to choose a shipping method. You can also control how customers will be charged for shipping. This section all depends on how you would like to set things up. You can set one rate for your specific business area or other rates for people outside of your business area.
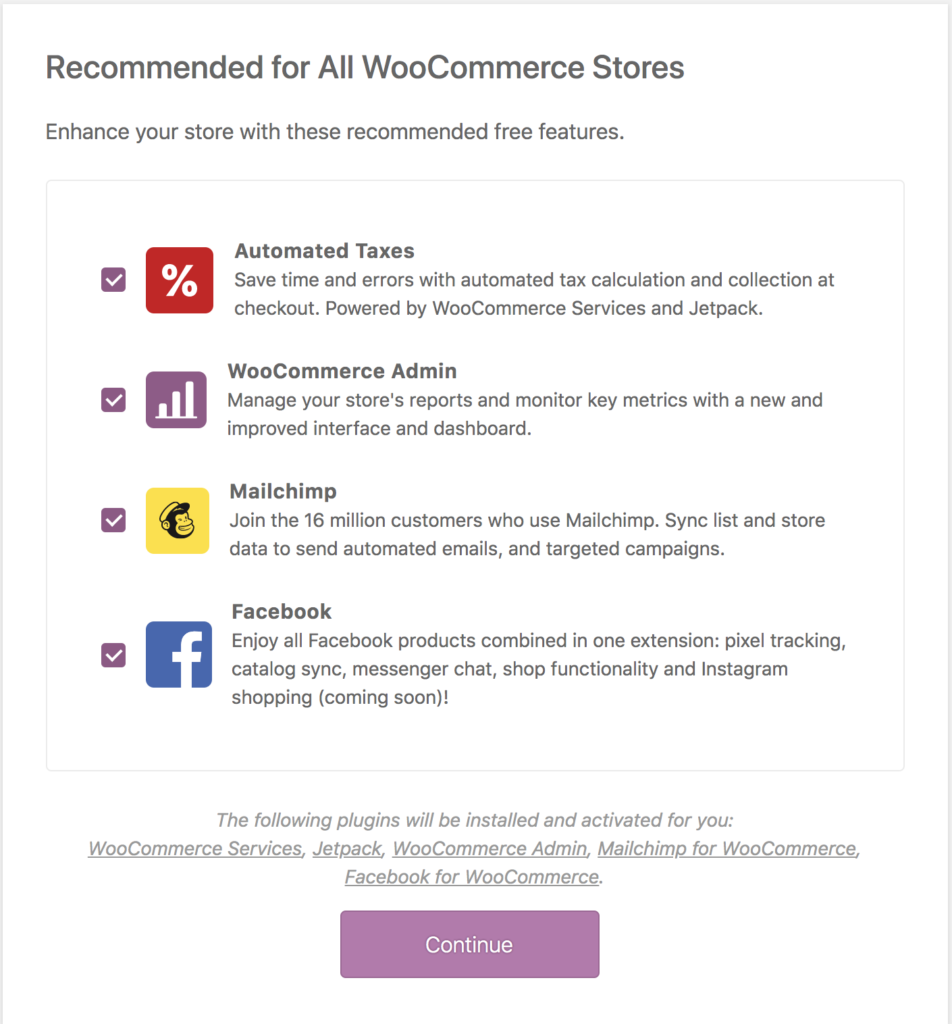
- After you have configured some of the basic settings, you can now review additional add-ons. These add-ons are not necessary to operate your store but the add-ons can simplify some aspects of setting up your store.
- You are almost done! Before you complete your setup process, you have the option to enable JetPack. Jetpack is another WordPress plugin with unique features that can help with setting up and operating your store. This plugin is not required, however, due to recent legal changes, U.S. citizens will want to enable Jetpack. It enables better security, store monitoring, store stats, and product promotion.

WOOHOO! You have just installed and set up your online store! If you have completed all of the steps above, then your store is ready to us. You can start adding products once you have gotten to this point. After installing WooCommerce, you will see two new tabs available on your dashboard’s side menu: WooCommerce and Products. WooCommerce contains your store’s settings and Products contain your product settings.
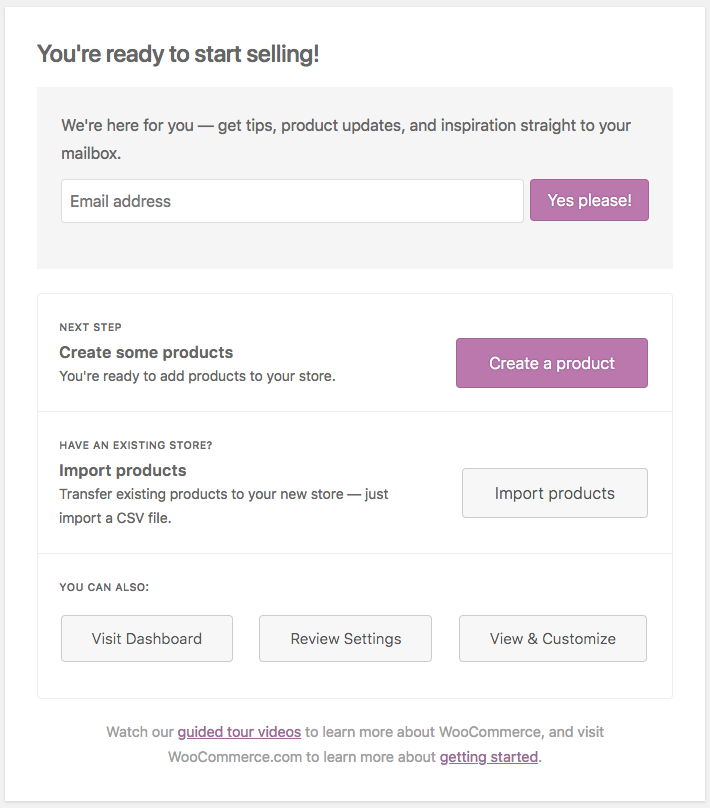
You can continue modifying the features and options to fit your liking. Once you have started adding your products, you are ready to start selling! Don’t be afraid to blast your eStore on social media to grow your customer base! You can thank us later… Get to sellin’!